Recently I decided to get better control of the colors in my images by purchasing the X-RITE COLOR CHECKER PASSPORT. Upon reading the instructions I was a little mystified by the requirements for a .DNG or DIGITAL NEGATIVE FILE. So I set out and did what anyone else would do I went to YouTube. I found the answer numerous times as part of larger tutorials that were way beyond my memory capacity. I prefer baby steps. Below is the simple sequence for creating .DNG files in ADOBE CAMERA RAW. It’s important to note that the .DNG files can be created in ADOBE PHOTOSHOP and ADOBE BRIDGE (Probably other Adobe Applications as well).
The process is quite simple:
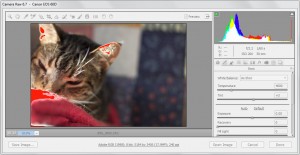
Double click a RAW IMAGE FILE from your DIGITAL CAMERA. This will open ADOBE CAMERA RAW and you will be presented with an image similar to what is displayed below.

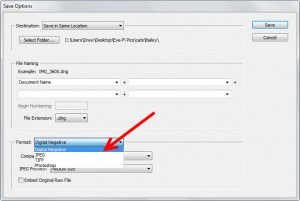
Once you are presented with the above window. Click the “Save Image” button in the lower left corner of the Adobe Camera Raw window. That will present you with a new window shown below. In that new window select where you want to save your file. By default it will be the same location as the existing image. Then from the “Format” drop down menu select “Digital Negative”

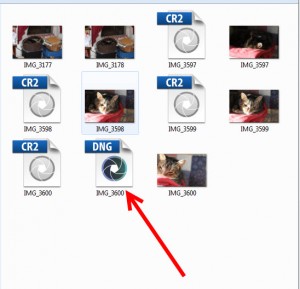
That is all there is to it. To verify your file saved correctly browse to the folder where you saved your .DNG in the step above and verify your .DNG exists. In the image below I have the view set for large icons to make it easier to view for the purposes of this page.

Be the first to leave a review.
